Reheating breadsticks to bring back their fresh-from-the-oven taste can be a delicious experience. Whether you have leftover breadsticks from a restaurant or you made them yourself, knowing the best reheating methods will ensure you enjoy warm, crispy breadsticks every time. In this guide, I will share with you the top techniques for reheating breadsticks, including using an oven, microwave, and air fryer. These easy breadstick reheating techniques will help you achieve that perfect balance of crispy exterior and soft, warm interior, so you can savor the scrumptiousness of fresh breadsticks whenever you desire.
Key Takeaways:
- Reheating breadsticks in the oven, microwave, or air fryer can help bring back their fresh-from-the-oven taste.
- Using the oven method, preheat the oven to 350°F (175°C), place the breadsticks on a baking sheet, cover with foil or an oven-friendly bag, and bake for 3-5 minutes.
- The microwave method involves placing the breadsticks on a microwave-safe dish, covering with a damp paper towel, and microwaving on high for about 15-20 seconds.
- To reheat breadsticks in an air fryer, preheat the air fryer to 320°F (160°C), place the breadsticks inside, and cook for 3-4 minutes until crispy and heated through.
- Properly storing breadsticks wrapped in foil or plastic wrap in an airtight container helps maintain their freshness.
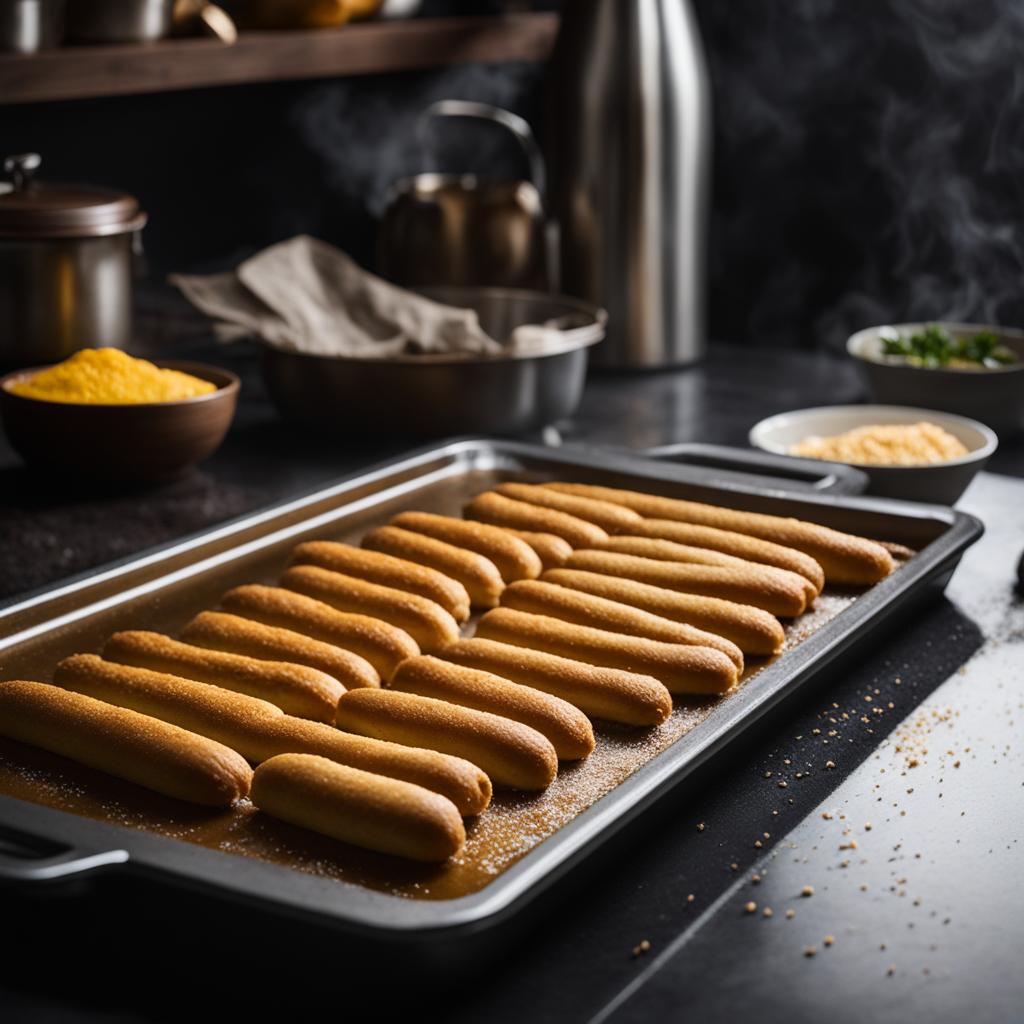
Reheating Breadsticks in the Oven
When it comes to reheating breadsticks, using the oven is a reliable method that helps recreate that fresh-from-the-oven taste. Follow these simple steps to enjoy warm and crispy breadsticks:
- Preheat your oven: Start by preheating your oven to 350°F/175°C. This ensures that the breadsticks will be heated evenly.
- Prepare the baking sheet: Place the breadsticks on a baking sheet or pizza stone. Make sure to leave enough space between them to ensure even heating.
- Cover the breadsticks: To prevent the breadsticks from drying out, cover them with foil or use an oven-friendly bag. This helps retain moisture and ensures that the breadsticks stay soft on the inside.
- Bake and monitor: Place the baking sheet in the preheated oven and bake the breadsticks for 3-5 minutes. Keep an eye on them to prevent burning or overcooking.
- Enhance the flavor: For an extra burst of flavor, brush the breadsticks with olive oil and sprinkle them with fresh herbs, such as basil or oregano. This step adds a delightful aroma and enhances the overall taste.
Reheating breadsticks in the oven ensures that they are warmed through without compromising their crispy texture. By following these simple steps, you can enjoy breadsticks that taste just as delicious as when they were freshly baked.
Note: Image illustrates the process of reheating breadsticks in the oven.
Reheating Breadsticks in the Microwave
If you’re looking for a quick and convenient way to reheat breadsticks, the microwave is a great option. Place the breadsticks on a microwave-safe dish and cover them with a damp paper towel. Microwave them on high for about 15-20 seconds, checking for the desired warmth. Be cautious not to overheat the breadsticks, as they may become chewy. While the microwave method is convenient, it may not yield the same crispy results as the oven or air fryer methods.
When reheating breadsticks in the microwave, it’s important to follow a few key steps to ensure the best results. Start by selecting a microwave-safe dish that is large enough to accommodate the breadsticks without overcrowding. Placing the breadsticks in a single layer allows for even heat distribution, resulting in uniform reheating.
Covering the breadsticks with a damp paper towel helps to retain moisture and prevent them from drying out during the reheating process. The moisture from the towel creates a steamy environment, helping to soften the breadsticks and make them more enjoyable to eat. Additionally, the damp paper towel prevents the breadsticks from becoming overly chewy or tough.
Once the breadsticks are arranged on the dish and covered with the damp paper towel, it’s time to microwave them. Set your microwave to high power and start with an initial heating time of 15-20 seconds. This will warm up the breadsticks without making them too hot.
Keep a close eye on the breadsticks as they heat up. Depending on the wattage of your microwave and the size of the breadsticks, the heating time may vary. Stop the microwave and check the breadsticks after the initial heating time to gauge their warmth. If they need more time, continue microwaving in 5-second intervals until they reach the desired temperature.
Remember, it’s better to slightly underheat the breadsticks than to overheat them. Overheating can result in dry, chewy breadsticks that do not taste as good as fresh ones. By being mindful of the reheating time and checking the breadsticks frequently, you can ensure they come out just right.
While the microwave method is quick and convenient, it may not give the same crispy results as the oven or air fryer methods. The microwave tends to soften the outer texture of the breadsticks, making them more moist and tender. If you prefer a crispy exterior, consider using the oven or air fryer for reheating your breadsticks.
Reheating Breadsticks in an Air Fryer
The air fryer is a game-changer when it comes to reheating breadsticks. Not only does it bring them back to life, but it also gives them that coveted crispy texture, resembling freshly baked ones. Follow these simple steps to achieve perfectly reheated breadsticks in your air fryer:
- Preheat your air fryer to 320°F (160°C).
- Place the breadsticks in the air fryer basket, ensuring they are evenly spaced.
- Cook for 3-4 minutes, or until the breadsticks are crispy and heated through.
That’s it! Your breadsticks are now ready to be savored. With the air fryer method, you can enjoy breadsticks that taste just as good as when they were first baked.
For visual inspiration, take a look at this crispy batch of reheated breadsticks:
Now, let’s compare the different methods of reheating breadsticks in a handy table:
| Reheating Method | Time | Texture |
|---|---|---|
| Oven | 3-5 minutes | Crispy outside, soft inside |
| Microwave | 15-20 seconds | Softer and less crispy |
| Air Fryer | 3-4 minutes | Crispy and reminiscent of freshly baked |
As you can see, using an air fryer produces the best results, with breadsticks that retain their crispy texture. So, if you want to enjoy warm and delicious breadsticks without compromising on taste and texture, the air fryer method is your go-to option.
Tips for Keeping Your Breadsticks Fresh
If you have leftover breadsticks that you want to keep fresh, follow these simple tips to ensure they maintain their deliciousness:
Proper Storage
When it comes to keeping breadsticks fresh, proper storage is key. Here’s how:
- Wrap: Wrap the breadsticks tightly in foil or plastic wrap. This helps to retain moisture and prevent them from drying out.
- Airtight Container: Place the wrapped breadsticks in an airtight container. This further protects them from air exposure and helps to maintain their freshness.
Refrigeration and Freezing
If you need to store the breadsticks for longer periods, consider refrigeration or freezing:
- Refrigeration: Breadsticks can be refrigerated for up to 10 days. Be sure to keep them in an airtight container to prevent them from absorbing odors from other foods in the fridge.
- Freezing: To store breadsticks for an extended period, freezing is your best option. They can be frozen for up to 2 months. Place them in a resealable plastic bag or freezer-safe container to protect them from freezer burn.
Remember to label the container with the date of freezing or refrigeration for easy reference.
Retaining Freshness During Reheating
When it’s time to reheat your breadsticks, ensure you retain their delicious flavor and crispy texture:
“By using one of the reheating methods mentioned earlier, you can enjoy warm, crispy breadsticks that taste just as good as when they were freshly baked.”
Reheating methods such as the oven, microwave, or air fryer can help you achieve the desired results. These methods heat the breadsticks evenly, ensuring they stay crispy and retain their original texture. Just be sure to follow the reheating instructions provided in the earlier sections for the best outcome.
By following these tips for storing and reheating your breadsticks, you can enjoy every bite with the same freshness and flavor as when you first baked or ordered them!
Other Ways to Enjoy Your Leftover Breadsticks
If you have leftover breadsticks and want to get creative, there are several creative ways to use leftover breadsticks beyond reheating. Let me share some alternative uses for breadsticks that will excite your taste buds!
1. Turn them into Croutons
If your breadsticks have gone slightly stale, don’t throw them away! Instead, transform them into delicious homemade croutons. Cut the breadsticks into small cubes, and toss them in olive oil, garlic powder, and Italian seasoning. Spread the seasoned breadstick cubes on a baking sheet and bake them at 350°F/175°C for about 10 minutes, or until they turn crispy and golden. These croutons will add a delightful crunch to your salads or soups.
2. Use them as Crumb Toppings
Give your favorite mac and cheese or casseroles a flavorful twist by using leftover breadsticks as crumb toppings. Crush the breadsticks into small crumbs and mix them with melted butter and herbs like thyme or rosemary. Sprinkle the mixture on top of your dish before baking, and enjoy the crunchy goodness that enhances both flavor and texture.
3. Make Garlic Toast
Transform your leftover breadsticks into a crowd-pleasing appetizer by making garlic toast. Cut the breadsticks in half lengthwise and brush them with a mixture of olive oil and minced garlic. Place the breadsticks on a baking sheet and bake at 350°F/175°C for 5-7 minutes, or until they become crispy and lightly golden. Serve the garlic toast as a flavorful side dish or pair it with your favorite dip.
4. Dip in Plant-Based Alfredo Sauce
For a delectable snack, toast your leftover breadsticks and pair them with a creamy plant-based alfredo sauce. Simply slice the breadsticks into bite-sized pieces and toast them in the oven or toaster until they’re warm and crispy. Serve them alongside a bowl of homemade or store-bought plant-based alfredo sauce for a delightful combination of flavors.
These creative ways to use your leftover breadsticks will help you repurpose them into exciting and tasty dishes. Get creative in the kitchen, experiment with flavors, and let your imagination run wild!
Conclusion
Reheating breadsticks to bring back their fresh-from-the-oven magic is a breeze with the methods described in this guide – oven, microwave, or air fryer. Whether you prefer the convenience of the microwave, the crispy results from the oven, or the game-changing texture from the air fryer, you can enjoy warm and delicious breadsticks every time.
Properly storing your breadsticks is crucial to maintaining their freshness. By wrapping them in foil or plastic wrap and storing them in an airtight container, you can prevent them from drying out and becoming stale. Whether you have leftover breadsticks from a restaurant or made a batch at home, don’t let them go to waste – they can still be a delightful part of your dining experience.
But reheating isn’t the only way to enjoy your breadstick leftovers. Get creative and explore alternative uses for them. Transform them into crunchy croutons for salads or use them as a flavorful crumb topping for your favorite dishes. From garlic toast to delicious dips, there are endless possibilities for repurposing breadsticks and adding an extra dash of flavor to your meals.
So, don’t let those delicious breadsticks go to waste – reheat and repurpose them, and bring back that warm, crispy goodness for a delightful dining experience. With the right methods and a little creativity, you can savor the magic of fresh breadsticks anytime you want.
FAQ
How do I reheat breadsticks?
There are several ways to reheat breadsticks, including using an oven, microwave, or air fryer. Each method has its own advantages, so you can choose the one that suits your preferences and time constraints.
What is the best way to reheat breadsticks in the oven?
To reheat breadsticks in the oven, preheat your oven to 350°F/175°C, place the breadsticks on a baking sheet or pizza stone, cover them with foil or an oven-friendly bag, and bake for 3-5 minutes. The oven method ensures the breadsticks are warmed through without losing their crispy texture.
How do I reheat breadsticks in the microwave?
To reheat breadsticks in the microwave, place them on a microwave-safe dish and cover them with a damp paper towel. Microwave on high for about 15-20 seconds, checking for the desired warmth. This method is quick and convenient, but may not yield as crispy results as the oven or air fryer methods.
How do I use an air fryer to reheat breadsticks?
Preheat the air fryer to 320°F (160°C), place the breadsticks in the air fryer, and cook for 3-4 minutes until they are crispy and heated through. The air fryer method not only reheats the breadsticks, but also gives them a delightful crispy texture that resembles freshly baked ones.
How can I keep my breadsticks fresh?
To keep breadsticks fresh, wrap them in foil or plastic wrap and store them in an airtight container. This helps prevent them from drying out and becoming stale. If needed, you can refrigerate them for up to 10 days or freeze them for up to 2 months.
What are some creative ways to use leftover breadsticks?
Leftover breadsticks can be repurposed in various ways. You can turn them into croutons by cutting them into small cubes, tossing them in olive oil and seasonings, and baking them until crispy. Another option is to use them as a crumb topping for mac and cheese or casseroles. Additionally, you can make garlic toast by cutting the breadsticks in half, spreading olive oil and minced garlic, and baking until crispy. Dipping toasted breadsticks in plant-based alfredo sauce also makes for a delightful snack.